Marmor-Bananenbrot

Ingredients:
- 2 medium bananas, mashed (about 1 cup)
- 1/4 cup Greek yogurt
- 1/3 cup honey
- 1/4 cup melted coconut oil or butter
- 2 eggs
- 1 teaspoon vanilla extract
- 1 1/2 cups all-purpose flour
- 1 teaspoon baking soda
- 1/2 teaspoon salt
- 1/3 cup cocoa powder, sifted
- 1/3 cup chopped dark chocolate
Instructions:
- Preheat the oven to 350°F. Grease a 9x5 inch loaf pan.
- In a large bowl, whisk together the mashed bananas, Greek yogurt, honey, melted coconut oil or butter, eggs, and vanilla extract.
- In a separate bowl, whisk together the flour, baking soda, and salt. Add the dry ingredients to the wet ingredients and mix until just combined.
- Divide the batter in half. Add the cocoa powder and chopped chocolate to one half of the batter and mix until just combined.
- Spoon the two batters alternately into the prepared loaf pan. Use a knife to swirl the batters together.
- Bake for 50-60 minutes, or until a toothpick inserted into the center comes out clean.
- Cool the bread in the pan for 10 minutes, then transfer to a wire rack to cool completely.
How to prepare:
Preheating the oven to 350°F, greasing a 9x5 inch loaf pan, whisking together the mashed bananas, Greek yogurt, honey, melted coconut oil or butter, eggs, and vanilla extract, whisking together the flour, baking soda, and salt, adding the dry ingredients to the wet ingredients and mixing until just combined, dividing the batter in half, adding the cocoa powder and chopped chocolate to one half of the batter and mixing until just combined, spooning the two batters alternately into the prepared loaf pan, using a knife to swirl the batters together, baking for 50-60 minutes, or until a toothpick inserted into the center comes out clean, cooling the bread in the pan for 10 minutes, then transferring to a wire rack to cool completely.
Preparation time:
15 minutes
Servings:
8-10 servings
Nutrition Facts:
- Calories: 257
- Total Fat: 10g
- Saturated Fat: 8g
- Cholesterol: 47mg
- Sodium: 235mg
- Total Carbohydrate: 40g
- Dietary Fiber: 3g
- Sugars: 22g
- Protein: 5g
Tips:
- To make this recipe gluten-free, replace the all-purpose flour with a gluten-free flour blend.
- You can also add chopped nuts or dried fruit to the batter for added texture and flavor.
- This bread freezes well, so make a double batch and freeze one for later!
FAQs:
- Can I use a different type of oil or butter in this recipe?
- Yes! You can use any neutral oil or butter you prefer.
- Can I substitute the honey for another sweetener?
- Yes! Maple syrup or agave nectar will work well in this recipe.
- Can I use a different type of flour in this recipe?
- Yes! Whole wheat flour or spelt flour will work well in this recipe.
Einfaches Zucchini Reibekuchen Rezept

Ingredients:
- 2 medium zucchinis, grated
- 1 small onion, grated
- 2 eggs
- 1/4 cup flour
- 1/2 teaspoon salt
- 1/4 teaspoon pepper
- Oil, for frying
Instructions:
- Place the grated zucchini and onion in a clean kitchen towel and squeeze out the excess liquid.
- In a large bowl, whisk together the eggs, flour, salt, and pepper.
- Add the zucchini and onion to the batter and mix well.
- Heat a large skillet over medium-high heat and add enough oil to coat the bottom of the pan.
- Once the oil is hot, drop spoonfuls of the batter into the pan. Flatten each pancake with the back of a spatula.
- Cook for 2-3 minutes on each side, or until golden brown and cooked through.
- Transfer the pancakes to a paper towel-lined plate to drain off any excess oil. Serve hot.
How to prepare:
Placing the grated zucchini and onion in a clean kitchen towel and squeezing out the excess liquid, whisking together the eggs, flour, salt, and pepper in a large bowl, adding the zucchini and onion to the batter and mixing well, heating a large skillet over medium-high heat and adding enough oil to coat the bottom of the pan, dropping spoonfuls of the batter into the pan, flattening each pancake with the back of a spatula, cooking for 2-3 minutes on each side, or until golden brown and cooked through, transferring the pancakes to a paper towel-lined plate to drain off any excess oil, and serving hot.
Preparation time:
15 minutes
Servings:
4 servings
Nutrition Facts:
- Calories: 165
- Total Fat: 9g
- Saturated Fat: 2g
- Cholesterol: 98mg
- Sodium: 340mg
- Total Carbohydrate: 15g
- Dietary Fiber: 2g
- Sugars: 3g
- Protein: 7g
Tips:
- For a healthier version, try baking the pancakes in the oven instead of frying them.
- You can also add chopped herbs or spices to the batter for added flavor.
- This recipe is a great way to use up any leftover zucchini!
FAQs:
- Can I use a different type of flour in this recipe?
- Yes! Whole wheat flour or almond flour will work well in this recipe.
- Can I make these pancakes ahead of time?
- Yes! You can store the pancakes in the refrigerator for up to 2 days. To reheat, simply place them in the oven or toaster oven until heated through.
- Can I freeze these pancakes?
- Yes! You can freeze the pancakes for up to 3 months. To reheat, simply place them in the oven or toaster oven until heated through.
Zimtshake Rezept - Tigerfit

Ingredients:
- 1 scoop vanilla protein powder
- 1 banana, frozen
- 1 cup unsweetened almond milk
- 1 teaspoon cinnamon
- 1/2 teaspoon vanilla extract
- 1/2 teaspoon honey, optional
Instructions:
- Combine all ingredients in a blender and blend until smooth.
- Pour into a glass and garnish with extra cinnamon, if desired.
- Enjoy!
How to prepare:
Combining all ingredients in a blender and blending until smooth, pouring into a glass and garnishing with extra cinnamon, if desired, and enjoying!
Preparation time:
5 minutes
Servings:
1 serving
Nutrition Facts:
- Calories: 240
- Total Fat: 5g
- Saturated Fat: 1g
- Cholesterol: 35mg
- Sodium: 240mg
- Total Carbohydrate: 33g
- Dietary Fiber: 4g
- Sugars: 17g
- Protein: 20g
Tips:
- You can substitute any type of milk you prefer, such as soy milk, coconut milk, or cow’s milk.
- If you want a thicker shake, add a handful of ice cubes to the blender.
- You can also add other ingredients, such as nut butter, chia seeds, or spinach, for added nutrition.
FAQs:
- Can I make this shake ahead of time?
- Yes! Just place it in a sealed container in the refrigerator until you’re ready to drink it.
- Can I make this shake without protein powder?
- Yes! Just omit the protein powder and adjust the amount of milk to achieve your desired consistency.
- Can I use a different type of sweetener?
- Yes! You can use maple syrup, agave nectar, or stevia instead of honey.
Hawaii Toast
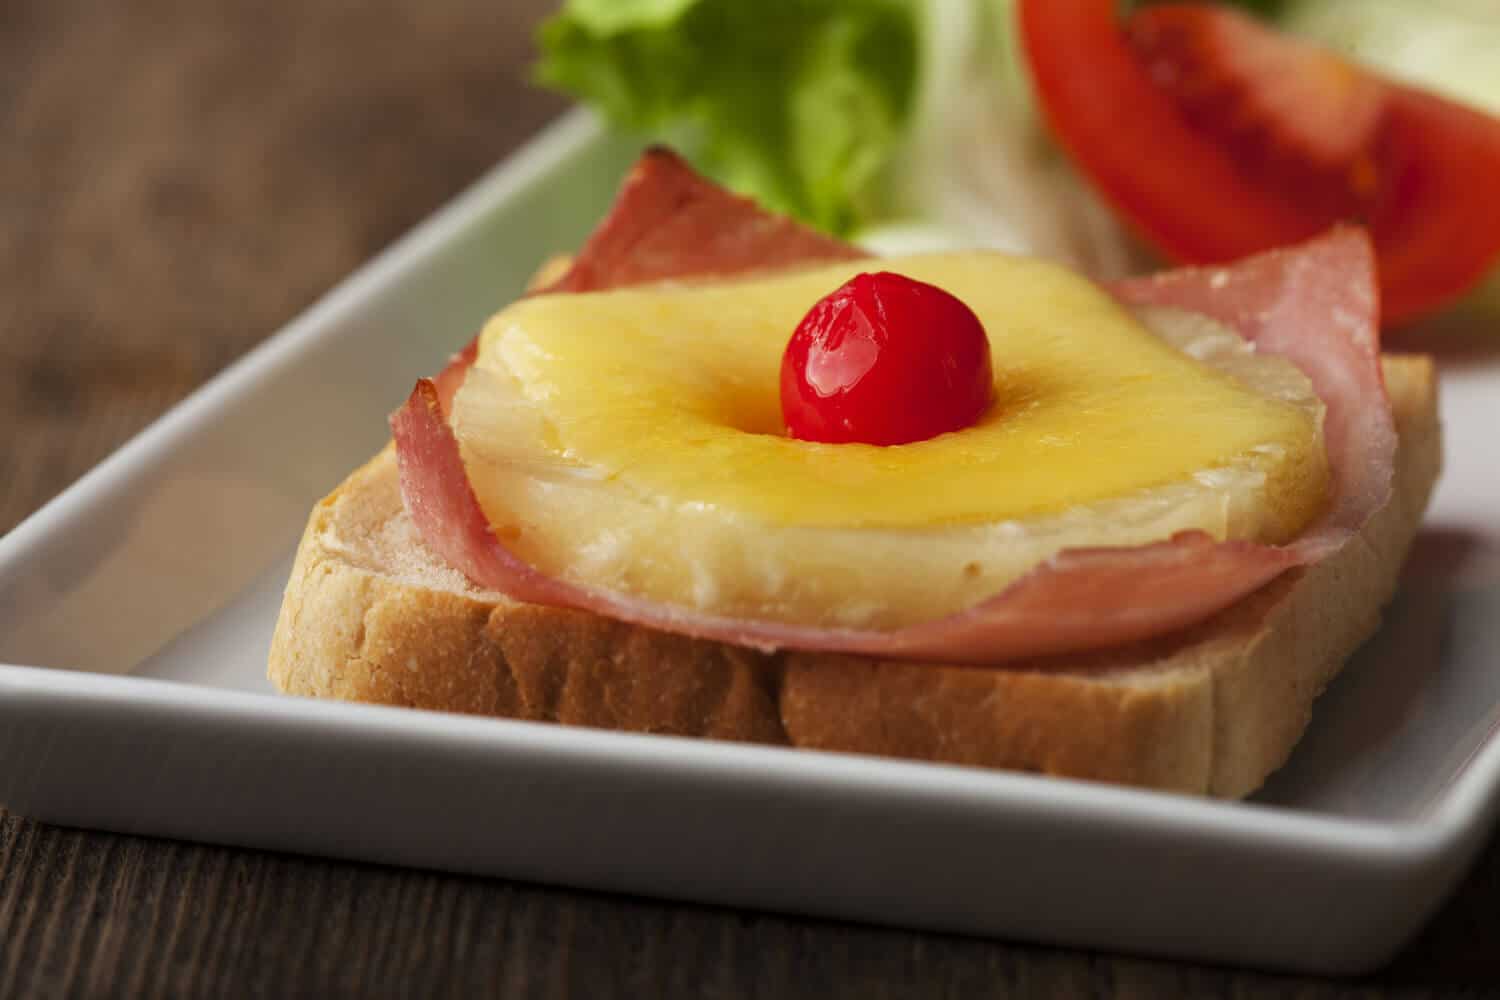
Ingredients:
- 4 slices of bread
- 4 thin slices of ham
- 4 slices of pineapple, canned or fresh
- 4 slices of cheese
- Butter
Instructions:
- Preheat the oven to 350°F.
- Toast the bread in a toaster or oven until lightly browned.
- Spread butter on each slice of bread.
- Layer a slice of ham, a slice of pineapple, and a slice of cheese on top of each slice of bread.
- Place the assembled toasts on a baking sheet and bake for 5-7 minutes, or until the cheese is melted and bubbly.
- Remove from the oven and serve hot.
How to prepare:
Preheating the oven to 350°F, toasting the bread in a toaster or oven until lightly browned, spreading butter on each slice of bread, layering a slice of ham, a slice of pineapple, and a slice of cheese on top of each slice of bread, placing the assembled toasts on a baking sheet and baking for 5-7 minutes, or until the cheese is melted and bubbly, removing from the oven and serving hot.
Preparation time:
15 minutes
Servings:
4 servings
Nutrition Facts:
- Calories: 331
- Total Fat: 19g
- Saturated Fat: 10g
- Cholesterol: 56mg
- Sodium: 687mg
- Total Carbohydrate: 20g
- Dietary Fiber: 2g
- Sugars: 8g
- Protein: 20g
Tips:
- You can use any type of bread you prefer, such as whole wheat or sourdough.
- If you don’t have a toaster oven, you can use a regular oven set to broil.
- You can also add other toppings, such as bacon, avocado, or tomato, for added flavor.
FAQs:
- Can I use a different type of cheese?
- Yes! Cheddar, Swiss, or mozzarella would all work well in this recipe.
- Can I make this recipe ahead of time?
- Yes! You can assemble the toasts ahead of time and store them in the refrigerator until you’re ready to bake them. Just add a few minutes to the baking